Creating and designing widgets
Widgets are how you display questions, forms or offers from Flow visitor journeys to your website.
We provide a number of widget types, along with different widget themes, that you can use to start with. Each widget can also be further configured to match your brand.
Available widgets
RightMessage includes a number of different widget types:
Bar
This widget will add a bar to either the top or bottom of your website.

Toaster
This widget will add a “toaster” that pops up (see what we did there?) from the bottom-right or bottom-left of your website.

Embedded
This widget will replace existing a placeholder on your website.

The embedded widget is special. Unlike the rest of our widgets, we aren’t just overlaying this widget on top of your existing content – instead, it’s mixed in to your website’s content. This makes it great for things like adding offers or opt-in forms directly beneath each of your blog posts.
When creating an embedded widget, in the Embed Code Shortname field enter in an internal name for this widget (no spaces or weird characters, please!) This will give you HTML like <div class="rm-area-after-blog-post"></div> that you can then add anywhere to your website. When found, we’ll add the current question or offer inside.

If you’re using our WordPress plugin, we can optionally automatically add an embedded widget after your posts.
Full-screen takeover
This widget will take over the entire web page and display a question or an offer.
This is useful for setting up dedicated pages that are used to segment visitors. Spin up a new page (what’s on it doesn’t matter), and then target a full-screen takeover to show on just this page. Now just drive your email list to this page.
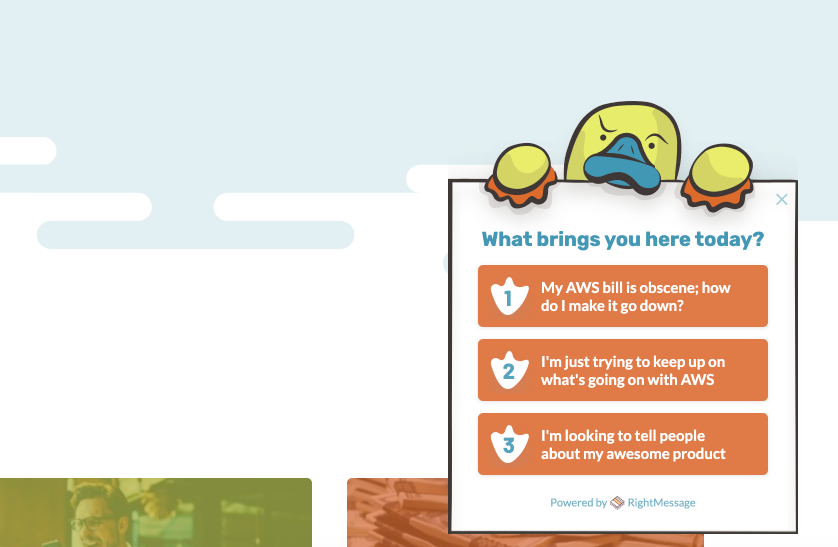
Popup
Popups can be triggered manually (i.e. by clicking a button), as an exit popup, or immediately when the page has loaded.

Widget visibility
You can change the visibility of the widget (to show only on specific pages OR to hide it on specific pages (or both!))

The values for each can also include a wildcard (* ), so /blog/* added to Only show this widget on specific pages would cause the widget to only appear on your blog.
Widget behavior
Trigger condition
Depending on the widget, there are various trigger options that can be attached to a widget.
These often include scroll percents, time on site, exit intent, and so on.

You can also change whether the widget should ask any questions found in a Flow, or should it skip questions and serve the first offer or form found.
You can also activate the "Back" button, so visitors can go back if they chose an answer incorrectly.

Pages to trigger on
Here you can set up whitelists and blacklists of pages that this widget should (or should not) appear on.
You probably don’t want our popups or widgets to show on things like your checkout pages or internal pages (i.e. /my-account ).
Don’t forget to configure your widgets to ignore these key pages.
Widget design
From the Design tab, you can change the structure, typography and colors of the widget.

Typography
A RightMessage widget will either inherit the current font (as determined by your page’s CSS) or you can specificy a Google Font that we should load and use for this widget.
Colors
You can also set the various colors used for a widget:
- Background: The background color of the widget. To set it as transparent, edit the color and enter
FFFFFF00for the Hex color. - Text on background: The color we’ll use for question and offer headlines and description text.
- Button color: The color we’ll use for buttons.
- Text on buttons: The color we’ll use for button text.
- Border color: the color we'll use for the border of the widget.
Additionally, you can totally customize a widget using CSS. Here’s a guide we’ve put together on how to do this.
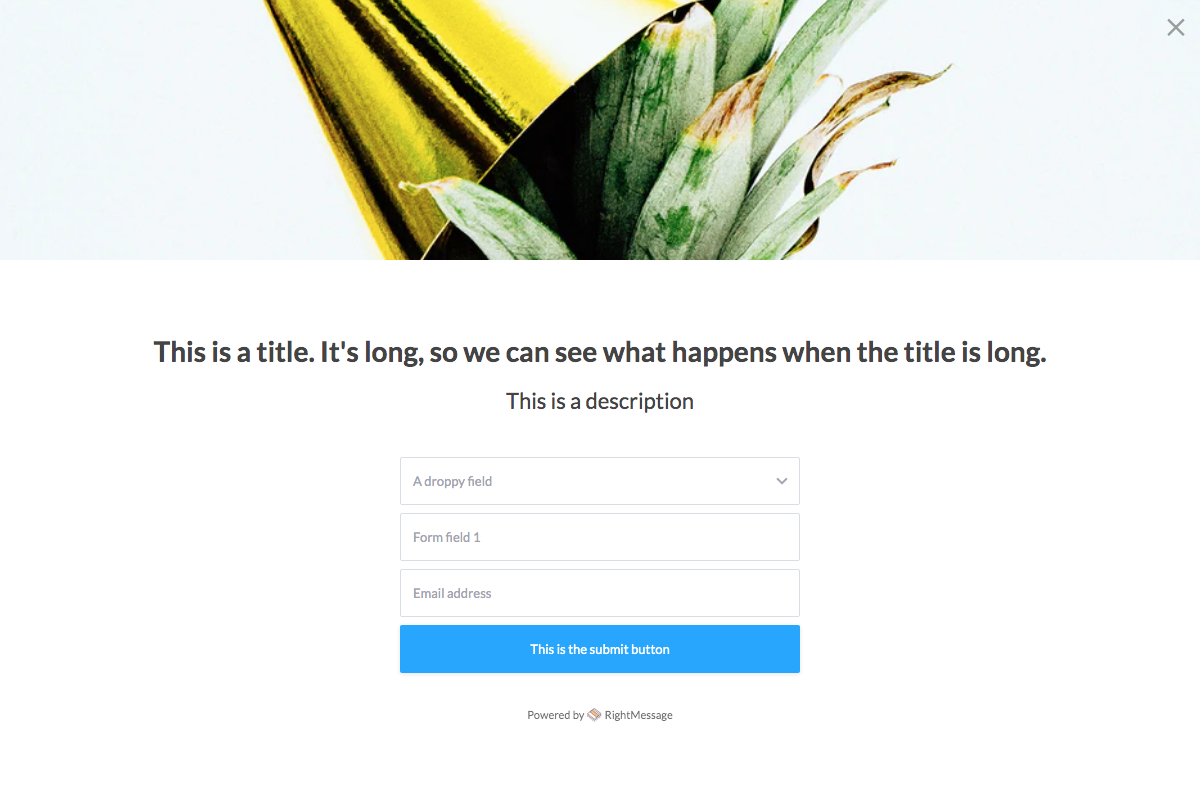
Previewing questions and offers within a widget
When editing a widget, you’ll see a preview of how this widget will render the various question and offer nodes you’ve added to the Flow.
To do this, toggle between the nodes you’ve added to your funnel (using the “Previewing…” dropdown.)

Disabling or renaming a widget
In the header, you can rename a widget or disable it.
If you do disable it, note that a Flow will only ever “show” to visitors if at least one widget is both enabled and available on the pages they’re viewing!

Any changes you make in RightMessage – including changes to CTA Funnels – won’t actually go live on your website until you click “Publish to your website”.
For more information on how this all works, check out our section on publishing.