
In this guide, you’ll learn how to map out sophisticated visitor journeys within a RightMessage Flow.
It’s all about “nodes” and “paths”
A Flow is made up of paths that lead to nodes.
At the top of every Flow is a path that leads downward. Think of this as “a page view has occured.” When the page has loaded and RightMessage runs, our software will follow this path down looking for nodes.
A node is a decision point (“should this person go down the left path, or the right path?”), a question, an offer (like a lead form), or where a Flow terminates – at least for the current page view.
And on every subsequent page view, this Flow will rerun. The visitor will go from the top, to the bottom of the Flow. Assuming nothing’s changed (like the visitor’s segmentation hasn’t changed, and there are no page-specific decision nodes) then they’ll follow the exact same path on every subsequent page view.
It’s ultimately up to you to determine how, and when, someone should go down a different page.
Along paths, you can create new nodes – which are outlined below.
Question
Questions in a Flow allow you to segment your visitors by asking them to provide information about themselves. When you add a Question component, you're essentially creating a way for visitors to self-segment into one of your Segment Groups.
How Questions Work
A question directly corresponds to a Segment Group
Each answer option corresponds to a segment within that group
Visitors who are already segmented won't see the question again
When Questions Display
A visitor will only see a question if they:
Haven't answered it before
Haven't been auto-segmented
Don't have existing segment data from your ESP/CRM
Creating a New Question
Click the Question node and drag it onto the Canvas onto a + sign where you want to place it.
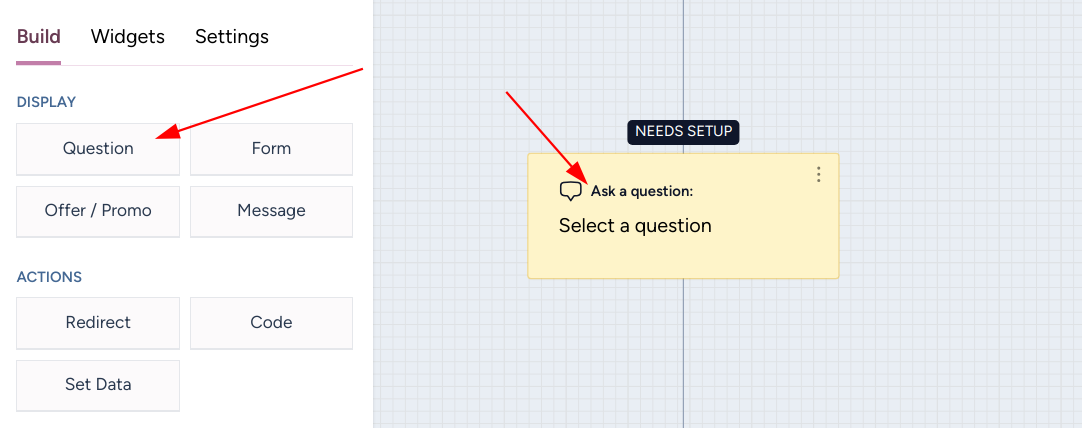
Click on the node and a slide in will appear where you can
Use an existing question
Ask a multiple choice
Ask a yes/no question
Ask an open ended question
Generate a question using AI
This creates both the question in your Flow AND a new Segment Group automatically.
Ask a multiple choice question
Click the + button in your Flow
Select "Question" from the Display section
Choose "Create new question"
Fill in the following:
What would you like to find out?
Enter your question text that visitors will see
Keep it clear and conversational
Example: "What's your biggest business challenge?
What are the possible answers?
Add your answer options one by one
Click "Add another answer option" for more choices
Keep options clear and mutually exclusive
Aim for 4-6 options maximum
Optional Settings:
Toggle "Collect open-ended answers with an 'Other' option" if you want to allow custom responses
If using Customer.io, you can sync answers to a specific attribute
Internal Name
Give your question a clear internal name
This helps you identify it in your Segments section
Example: "Business Challenge"
Use descriptive names that your team will understand
Click "Create Question" to add the question to your Flow and create its corresponding Segment Group.
Pro Tips
The internal name is for your reference only - visitors never see it
"Other" options can provide valuable insights but make personalization more challenging
Consider your ESP/CRM integration when naming questions
Remember: Questions are about gathering actionable data. Only ask what you'll actually use for personalization.
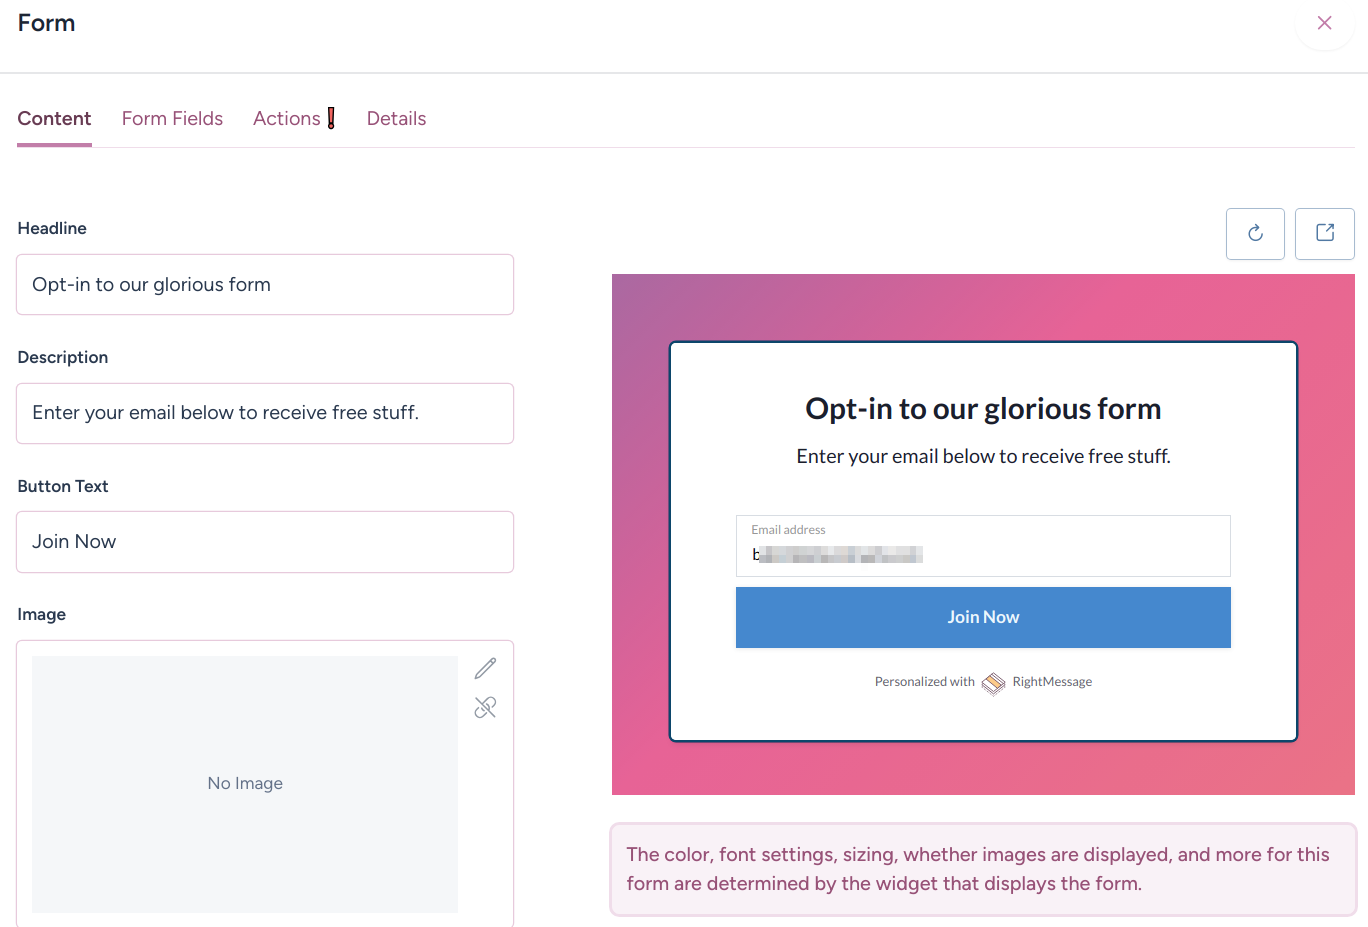
Form
Forms allow you to collect visitor information and sync it directly with your ESP/CRM. Unlike simple questions, forms can gather multiple pieces of information at once.
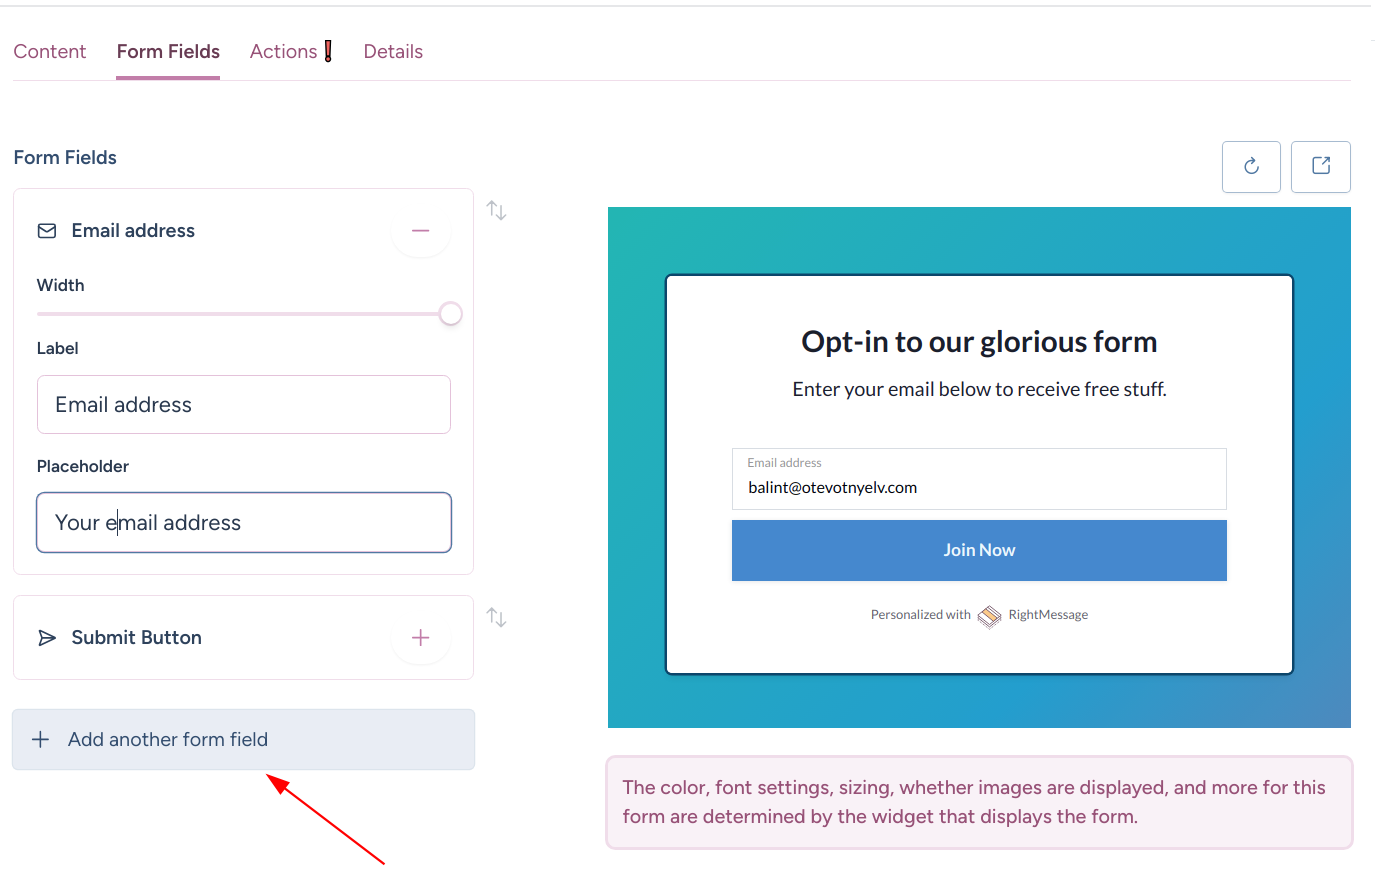
Form fields
The default form field is "Email address" - without it it's not really a form.
Advanced Field Types:
Text Input (single line)
Text Area (multiple lines)
Checkbox (single option)
Hidden Fields
Hidden Custom Fields
Hidden fields are powerful tools for data collection without user interaction. Use them to:
Pass UTM parameters
Track campaign sources
Record visit timestamps
Store segment data
Pass custom values to your ESP/CRM
Actions
Form Submission Actions
When a form is submitted, RightMessage can perform several actions in your ESP/CRM automatically:
Add to Segment:
Directly add subscribers to ESP segments
Update ESP/CRM tags
Add to specific lists or groups
Example: Add to "Newsletter Subscribers" segment
Trigger Events:
Fire custom events in your ESP
Trigger automation workflows
Start email sequences
Example: Trigger "Downloaded Guide" event
Best Practices
Keep forms as short as possible
Only ask for information you'll actually use
Clear submit button text ("Get the Guide" vs "Submit")
Consider mobile users - fewer fields are better
Test your form's integration with your ESP/CRM
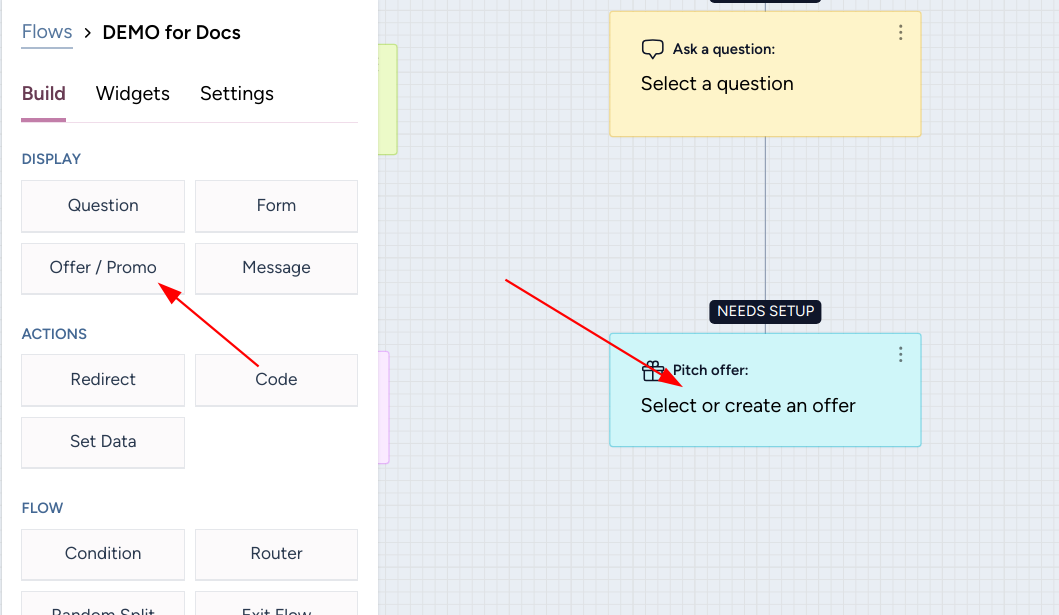
Offer / Promo
You can also pitch an offer within a Flow
Drag the Offer / Promo node onto a + node on the Canvas
Click the + on any path. Select Pitch an offer and either select an existing offer, or create a new one.
Offers 'terminate' a visitor's journey
Unlike with question nodes, offer nodes are terminating points in a Flow. There’s no way to add any nodes below an offer. Once an offer is “accepted” (the form is filled out and submitted, or the CTA button is clicked), the visitor is either taken to another page or shown a success message.
To not show offers again, gate the displaying of an offer with a "Condition" (yes/no decision) that either checks to see if the page the offer links to has been viewed or the tag/field data you set in your ESP/CRM when an offer form is submitted is present.
Message
Messages are display components that show content after specific actions (usually form submissions). To add a Message to your Flow:
Set up a Form somewhere in your Flow
Specify the Form
From the Display section, drag the Message component to the + node after the given form
The Message node will appear in your Flow
Common Uses:
"Thanks for subscribing!"
Download instructions
Next step guidance
Confirmation details
Redirect
The Redirect component lets you send visitors to specific URLs after actions or conditions are met.
Adding a Redirect
Find the + node where you want the redirect to happen
From the Actions section, drag the Redirect component onto the + node
Configure your redirect settings
Common Uses
After your survey ran you can redirect people to various pages on your website based on the gathered segmentation data
Resource download pages
Product pages based on segments
Course access links
Remember: Redirects end the current Flow - no components after a Redirect will execute.
Code
The Code component lets you execute custom JavaScript within your Flow. This is powerful for advanced customization and third-party integrations.
Adding Code
Locate a + node where you want to run code
From the Actions section, drag the Code component to the + node
The code editor will appear
Common Uses
Fire analytics events
Update custom cookies
Trigger third-party scripts
Manipulate page elements
Send data to external tools
Example Code Snippets
// Fire Google Analytics event
gtag('event', 'completed_survey', {
  'event_category': 'Engagement'
});

// Update cookie
document.cookie = "userType=subscriber; path=/";

// Custom tracking
mixpanel.track("Completed Onboarding");
Set Data
The Set Data component allows you to update custom fields or scoring in your ESP/CRM without requiring form submission.
Adding Set Data
Find the + node where you want to update data
From the Actions section, drag the Set Data component to the + node
Configure your data settings
Common Uses
Update lead scores based on behavior
Track page visits
Record engagement metrics
Flag specific actions taken
Example Scenarios
Increase "Product Interest" score when visiting pricing page
Set "Last Viewed Product" field
Update "Engagement Level" based on content viewed
Track tutorial completion progress
Condition
The Condition component creates Yes/No decision points in your Flow, allowing you to create different paths based on visitor data or behavior.
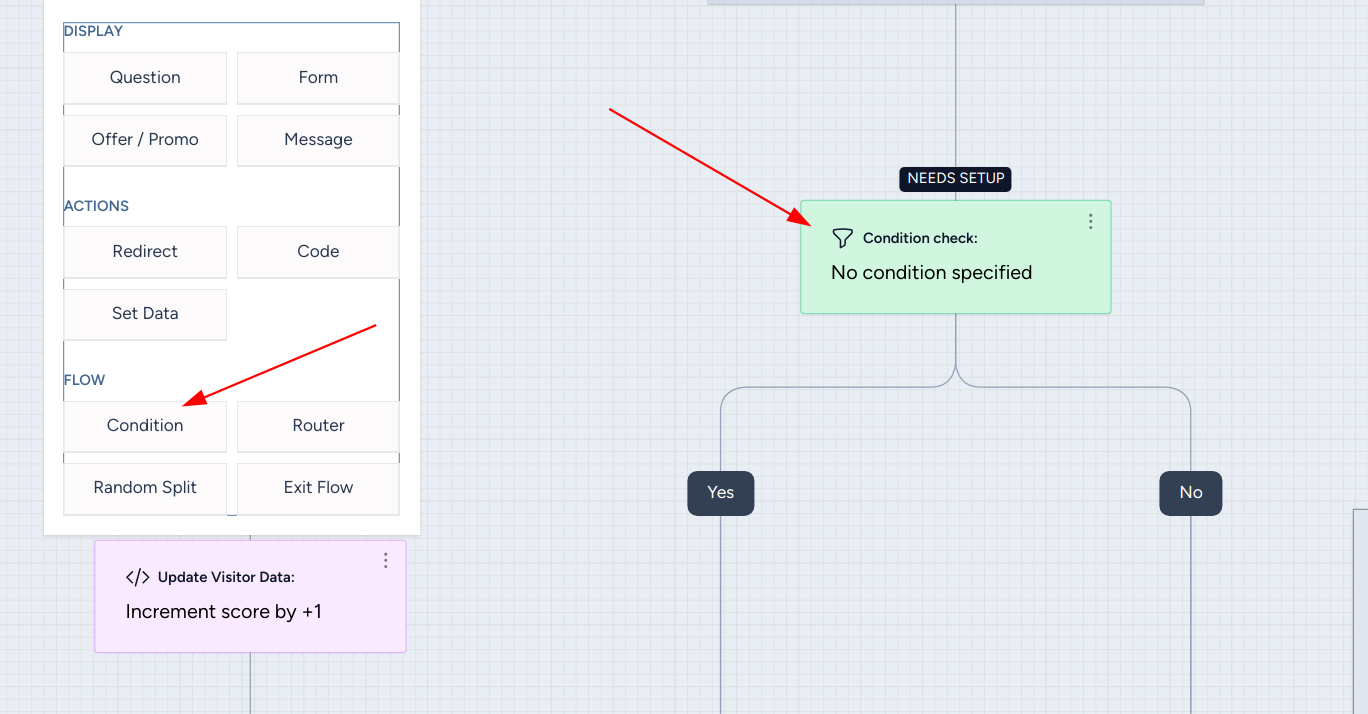
Adding a Condition
Look for where you want to split your Flow
From the Flow section, drag the Condition component to a + node
Configure your condition rules
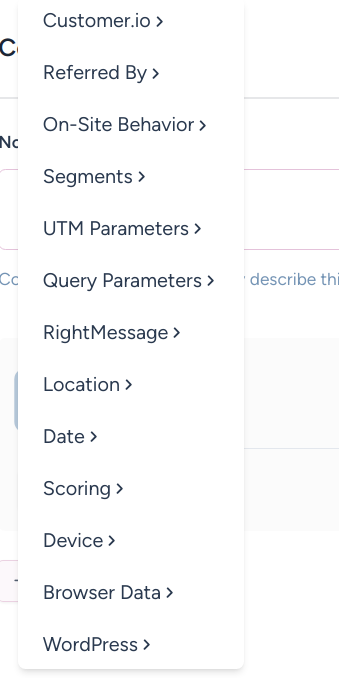
What You Can Check For
Anything that you can use to create Segment Groups:
How It Works
"Yes" path: Visitor matches condition
"No" path: Visitor doesn't match
Each path can lead to different components
Common Uses
Show different content to subscribers vs non-subscribers
Route based on engagement level
Personalize based on previous actions
Create targeted experiences
Router
The Router component lets you create multiple paths based on segments, creating different journeys for different types of visitors.
Adding a Router
Find where you want to split your Flow by segments
From the Flow section, drag the Router component to a + node
Select which Segment Group to route by
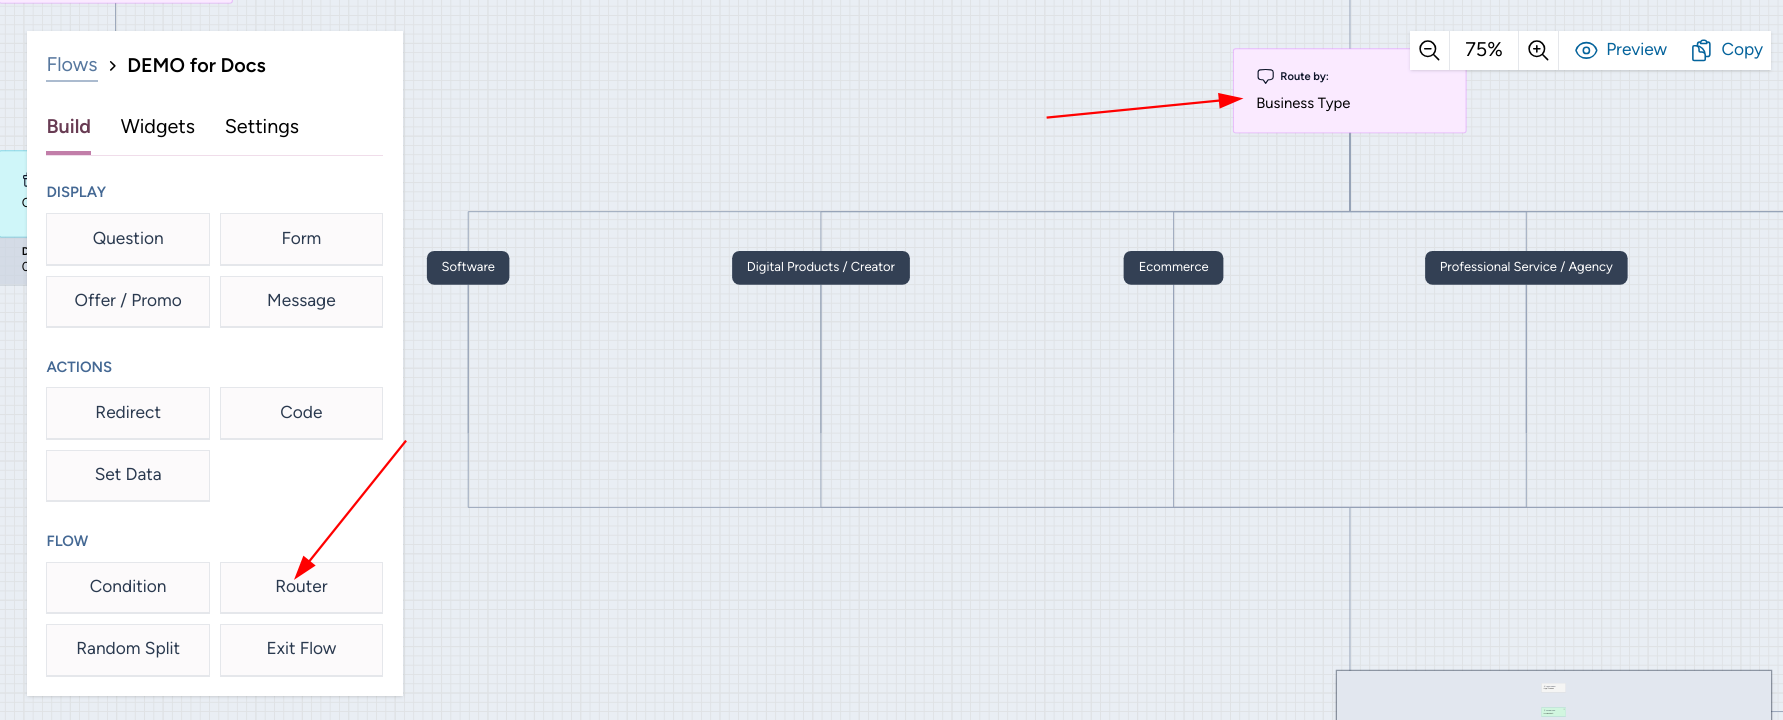
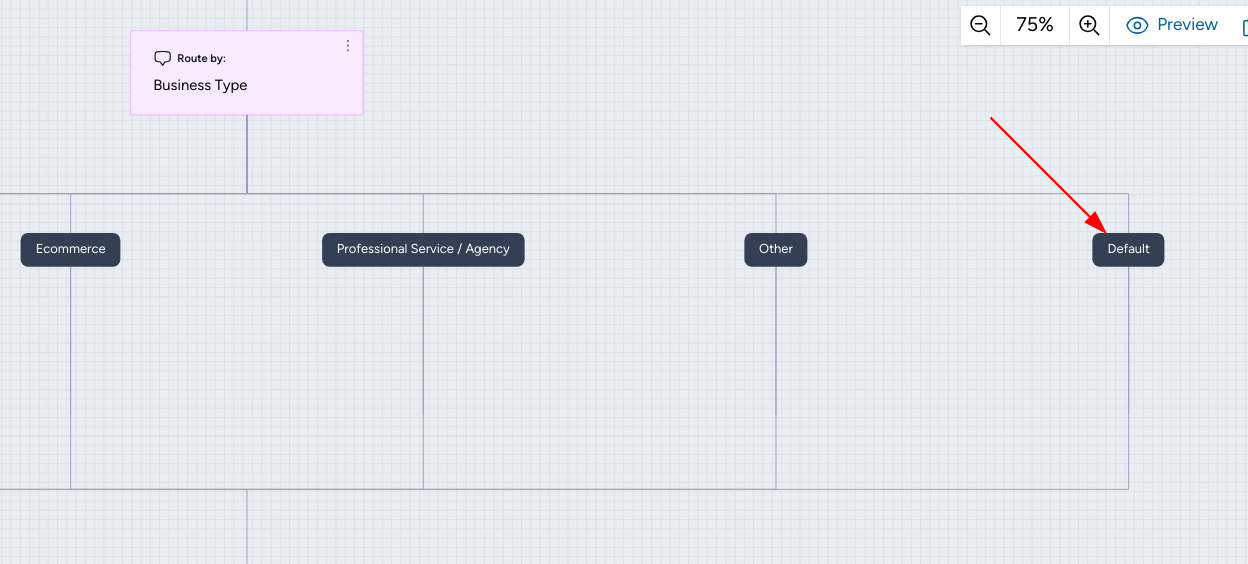
How Routing Works
Creates one path per segment in the selected group
Includes a "Default" path for unsegmented visitors
Visitors follow their matching segment path
Only one path can be followed
Note:
This is pretty similiar to adding an “Question” node and then setting up a split on that question node. The difference is that the visitor won’t be able to self-segment themselves with a “Router” node – if they aren’t yet segmented, they’ll be sent down the fallback path.
Remember: Unlike Conditions (Yes/No), Routers create paths for each segment in a group, allowing for more granular personalization.
Random Split
The Random Split component lets you create multiple paths with different probabilities, perfect for A/B testing or distributing traffic.
Adding a Random Split
Find where you want to split your Flow randomly
From the Flow section, drag the Random Split component to a + node
Set up how many different paths you want (default is 2)
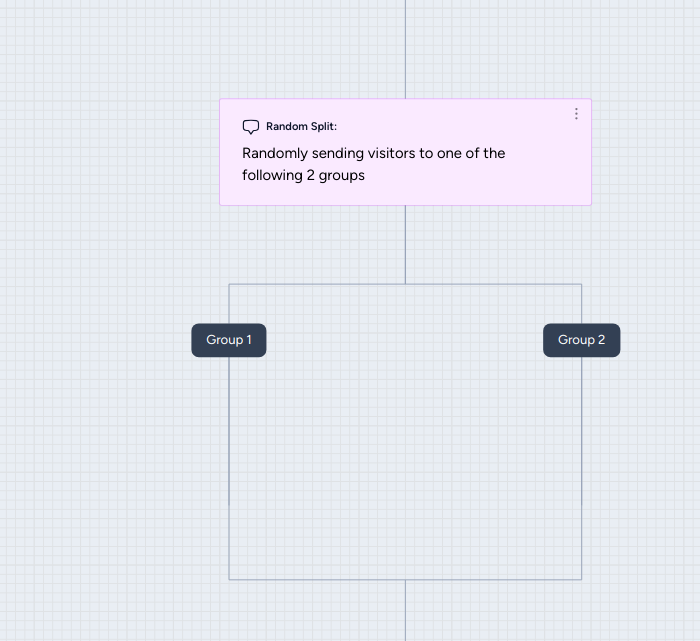
How It Works
Creates multiple paths with custom probability
Visitors are randomly assigned to a path
Assignment persists during the session
Example Uses
A/B Testing:
50/50 split between two offers
Testing different questions
Form variations
Message effectiveness
Exit Flow
The Exit Flow component ends the current flow path. It's a clean way to stop processing when no further actions are needed.
Adding an Exit
Find where you want to end a flow path
From the Flow section, drag the Exit Flow component to a + node
That's it - no configuration needed
Common Uses
Exit Flow is like a "The End" in your flow's story. You'll want to use it in several scenarios:
After Completing Goals:
When your flow has done its job - like after a form submission, displaying a crucial message, or when a visitor has taken your desired action. Think of it as a natural endpoint.
For Excluded Visitors:
Sometimes visitors shouldn't continue through your flow - maybe they're already subscribed, in the wrong segment, or have completed what you needed. Exit Flow gives them a clean way out.
Remember: Exit Flow doesn't mean the visitor can't enter other flows - it just ends the current one.