
Once you’ve integrated your RightMessage account with Userlist, you’ll be able to use us to capture new subscribers, segment your Userlist users, and personalize your website and show customized forms and offers using Userlist property data.
In this guide, we cover everything you need to know about segmenting and personalizing with Userlist + RightMessage.
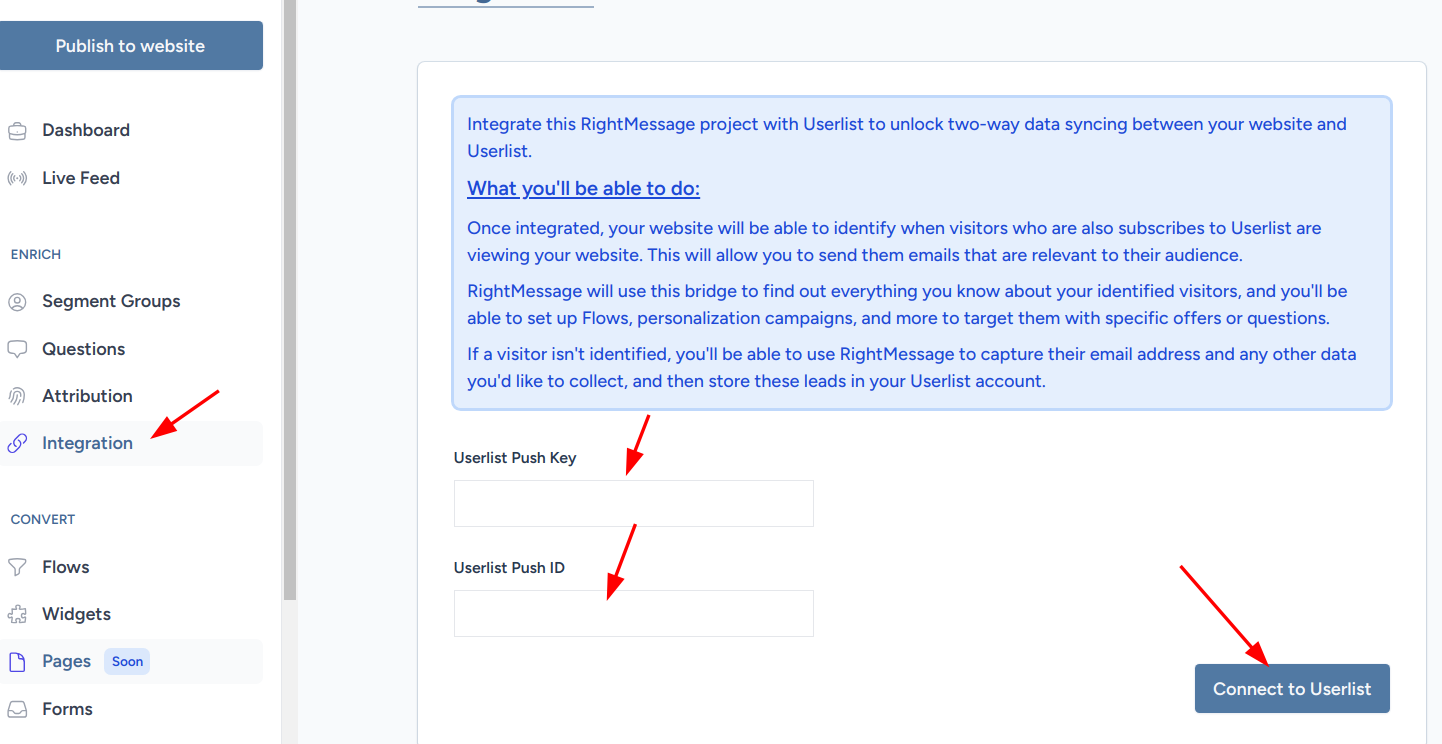
Linking RightMessage with Userlist
To create a link between RightMessage and Userlist, all you need to do is add your Userlist Push Key and Userlist Push ID to your RightMessage account.
Here’s how:
Step 1: Find your Push Key and Push ID
First, log in to your Userlist account and select Settings Gear → Push API
Here you’ll be able to see and copy the information RightMessage needs.
Step 2: Paste your Push Key and Push ID into the RightMessage integration area
In RightMessage, click on 'Integration' on the left, then choose Userlist, paste in your Push Key and Push ID into the respective fields and click Connect to Userlist .
That’s it!
Identifying Userlist users on your website
There are a handful of ways that RightMessage “knows” when someone on your website is also in your Userlist account.
If using RightMessage forms
When someone is added to your Userlist database by submitting a RightMessage opt-in form, we’ll cache the user record that we created on your behalf in their browser’s cookies.
We don’t have an expiration date for this cookie, but as long as someone doesn’t clear their cache or browse your website in an incognito browser, we’ll “know” who they are.
ID’ing whenever you send an email
Whenever you send an email to your list via Userlist, just be sure to include the following parameters to your links: ?u_id={{ user.email }}
For example, if you’re sending someone to your pricing page, this might end up looking like: https://yoursite.com/pricing?u_id={{ user.email }}
Userlist will handle injecting the email address of the recipient into the URL, and when the link is clicked through RightMesage will be able to identify the visitor. (The parameter will also be stripped from the URL prior to us caching that data in the browser’s cookies.)
The Userlist data we can use to segment website visitors
When a visitor is back on your website, RightMessage has immediate access to all property data attached to their associated Userlist record.
Check out our sections on segmentation, website personalization, and Flows for guidance on how to use this data.
Outputting property data (like someone’s first name) on your website
With RightMessage, you can output properties directly to your website. In our guide to adding contextual data and merge tags, we cover how to do this. But below is a bit of Userlist-specific context.
To include a Userlist property value within a text personalization, add: {{ userlist.customFields.favorite_color }} , replacing favorite_color with your property of choice.
Userlist transforms most properties you send to be all lowercase, and with underscores replacing any words. So if you called a property “Favorite color”, you’ll want to reference favorite_color .
And to output someone’s email address: {{ userlist.email }}