
Once you’ve integrated your RightMessage account with Mailchimp, you’ll be able to use us to capture new subscribers, segment your Mailchimp subscribers, and personalize your website with Mailchimp audiences (lists), tags, and merge fields.
In this guide, we cover everything you need to know about segmenting and personalizing with Mailchimp + RightMessage.
Linking RightMessage with Mailchimp
In RightMessage, click on 'Integration' on the left, then choose Mailchimp and click Connect to Mailchimp.
If you’re not signed in to your Mailchimp account, sign in now.
That’s it!
Identifying Mailchimp subscribers on your website
There are a handful of ways that RightMessage “knows” when someone on your website is also in your Drip account.
For information on how we identify visitors, you’re going to want to read this crash course guide first. Once you’ve read that, here are the nuances specific to Drip…
ID’ing whenever you send an email
In order for RightMessage to identify your Mailchimp subscriber and evaluate the lists and tags assigned to their profile, a connection needs to be established between your Subscriber and RightMessage.
Currently, Mailchimp withholds the subscriber data that identifies your subscribers when they click links in your emails.
In order for RightMessage to recognize someone clicking from your email as a subscriber, you will need to activate “E-commerce linking tracking” for each campaign you’d like RightMessage to recognize subscribers from.
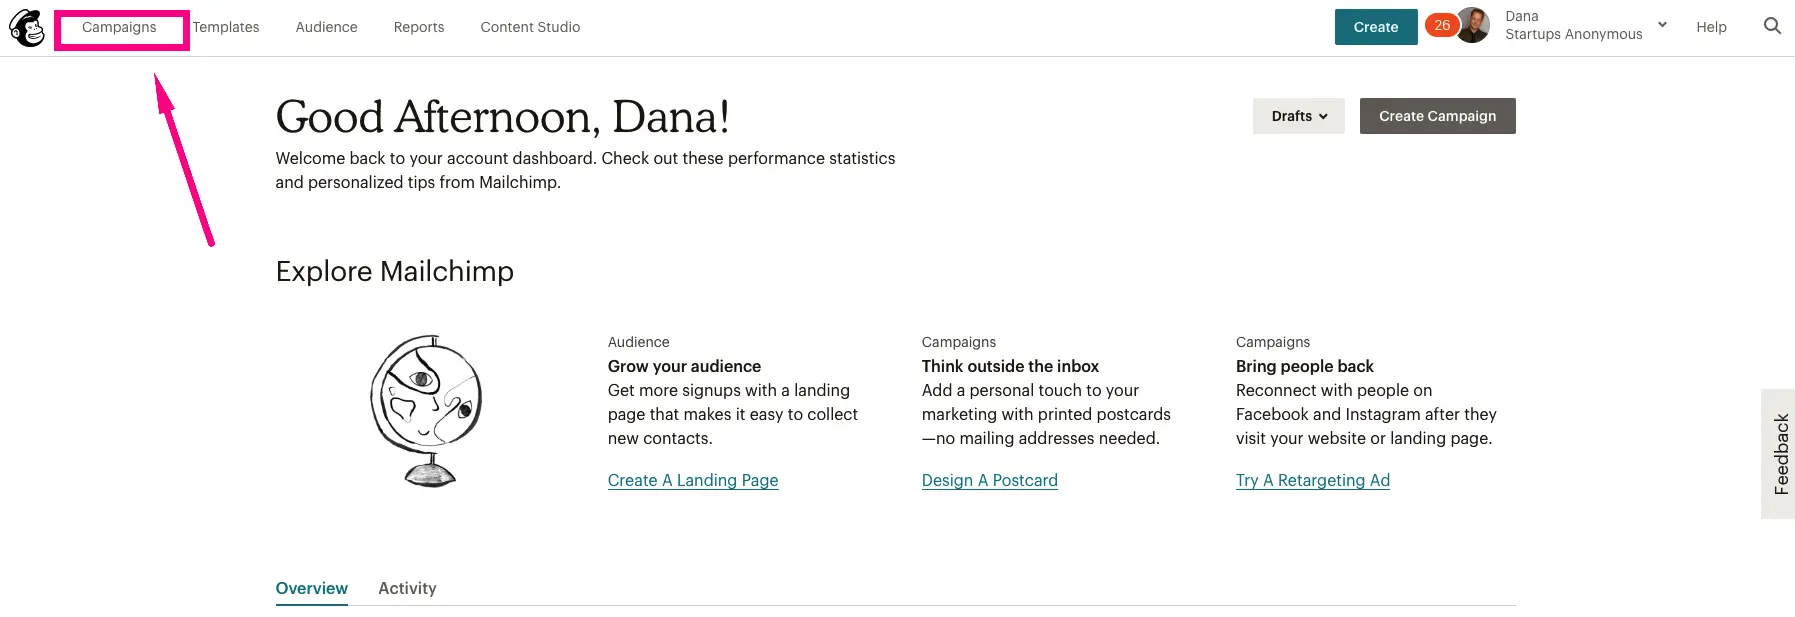
Log into your Mailchimp account.
In the top left corner of your dashboard, click ‘Campaigns’.
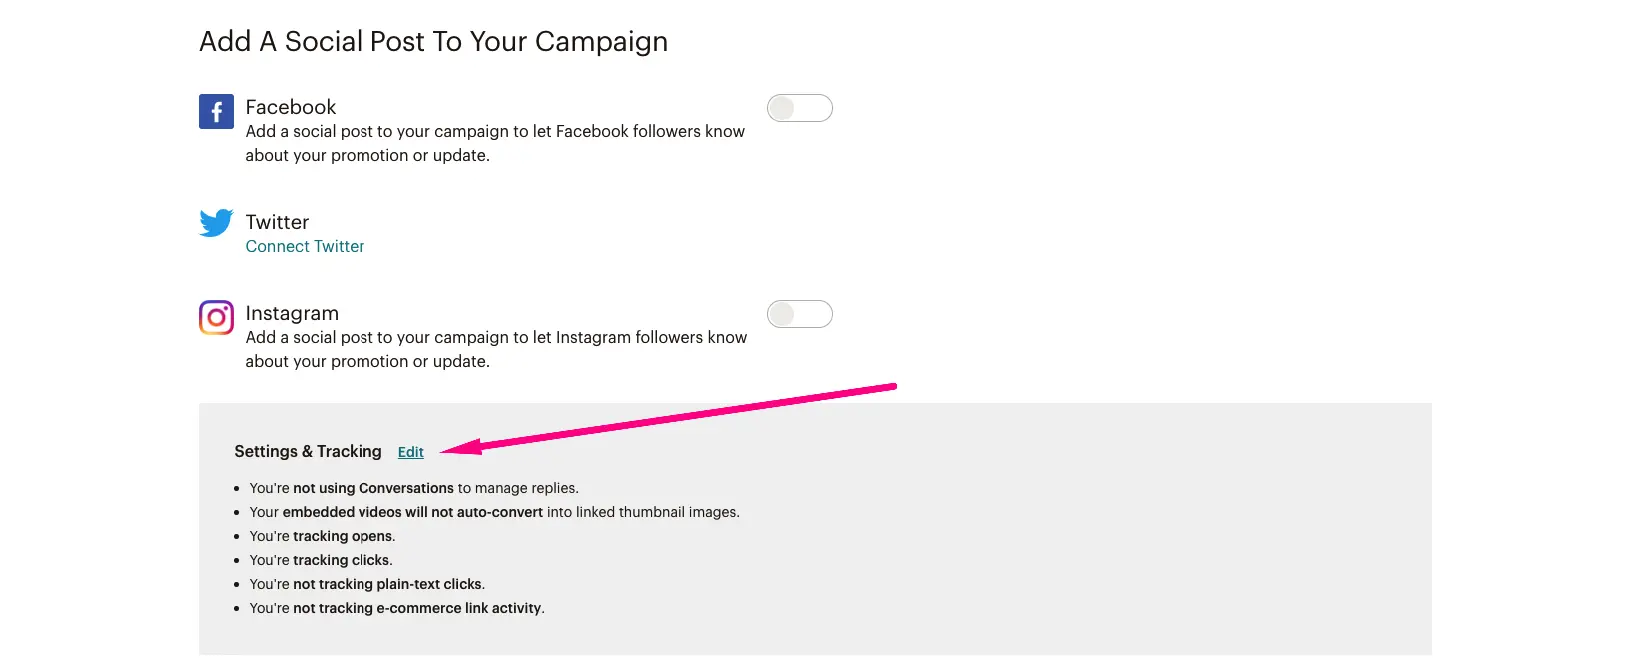
Click on the campaign you’d like to add the tracking to, scroll to the bottom of the page to find Settings & Tracking and click on edit .
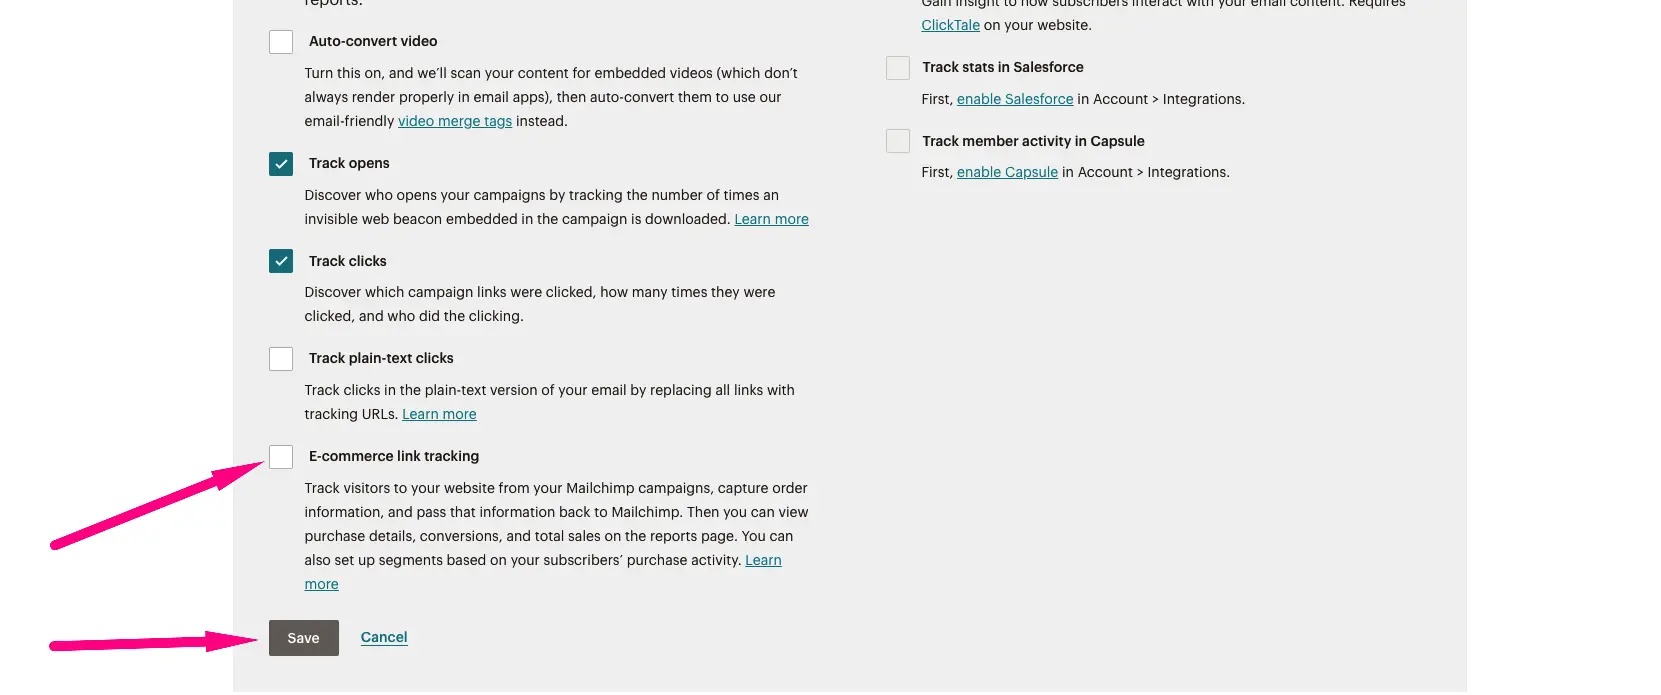
Check the box beside E-commerce link tracking and click save .
Quick heads up!
This process will need to be repeated for each campaign that you’d like RightMessage to recognize subscribers from.
Mailchimp forms and RightMessage’s forms?
Even if you switch entirely to using RightMessage’s forms rather than Mailchimp’s, we recommend that you continue to create Mailchimp forms.
Every unique offer in a Flow, like your newsletter opt-in form, should map to a complimentary newsletter opt-in form you’ve created in Mailchimp.
You’re going to want to do this both for attribution and automation reasons. By creating this link, you’ll be able to go into any subscriber in Mailchimp and see that they’ve submitted so-and-so forms.
You’re not going to need to worry about what you name these forms, or how they’re styled in Mailchimp, etc. We’re just going to be using these forms as references.
The Mailchimp data we can use to segment website visitors
When a visitor is back on your website, RightMessage has immediate access to:
Their audiences (lists)
Their tags
Their merge fields
Check out our sections on segmentation, website personalization, and Flows for guidance on how to use this data.
Outputting custom fields (like someone’s first name) on your website
With RightMessage, you can output known data (like merge fields) directly to your website. In our guide to adding contextual data and merge tags, we cover how to do this. But below is a bit of Mailchimp-specific context.
In Mailchimp, there’s no concept of built-in “native” fields.
So to output a field about a particular contact, you’ll use {{ mailchimp.customFields.favorite_color }} , replacing favorite_color with your custom field of choice. (This field should not have any spaces. Either include underscores, your_favorite_color , or leave it as a single word, industry .)
And to output someone’s email address: {{ mailchimp.email }}